You can share a dashboard with different users and give them the read, edit, or full permissions. Any changes made in the dashboard is visible to all the shared users. However, auto-arranging or re-arranging a widget’s size and position is reflected only on the current user’s dashboard.
Go to Dashboard from the navigation bar.
Select the dashboard you want to share and click Share.

Sharing a Dashboard
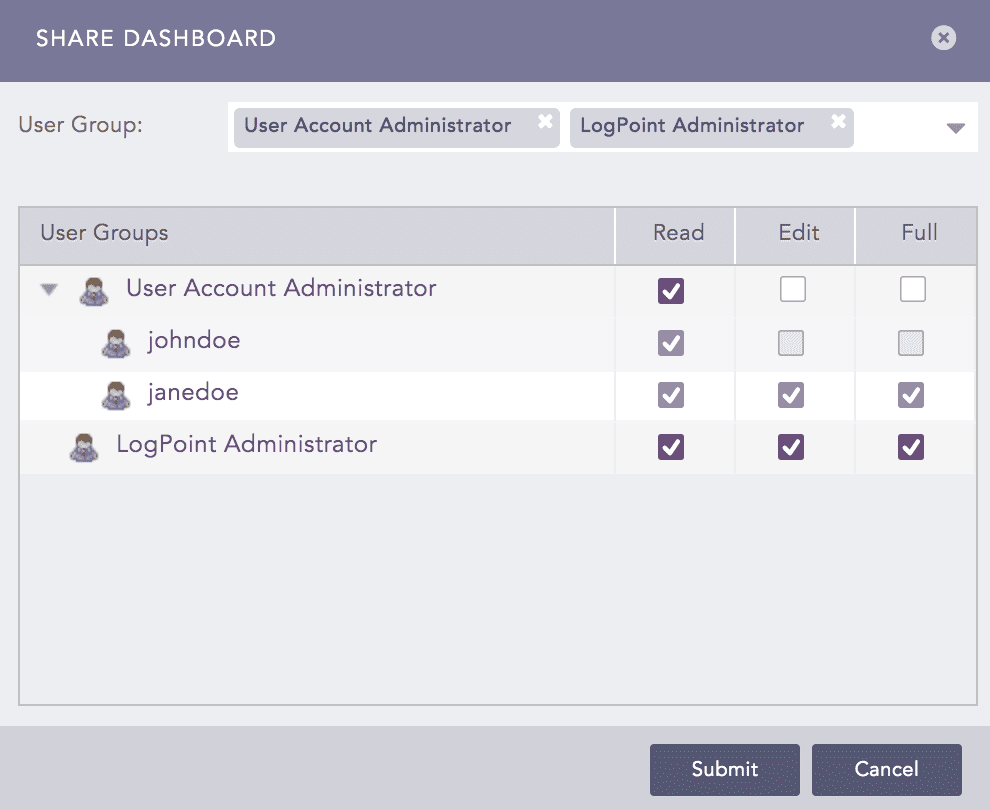
Select a User Group. All the users in that user group are listed in the drop-down.
Note
Refer to the User Account Management guide for details on configuring users and user groups.
Select the Read, Edit, or Full permission for the users. Selecting the Full permission allows the user to read, edit, remove, and share the dashboard.
Selecting Permission for Users
Click Submit.
Note
The dashboard sharing option is not available in the UEBA dashboard and the vendor dashboards.
By default, a new user has the same permission as the overall permission of their respective user group.
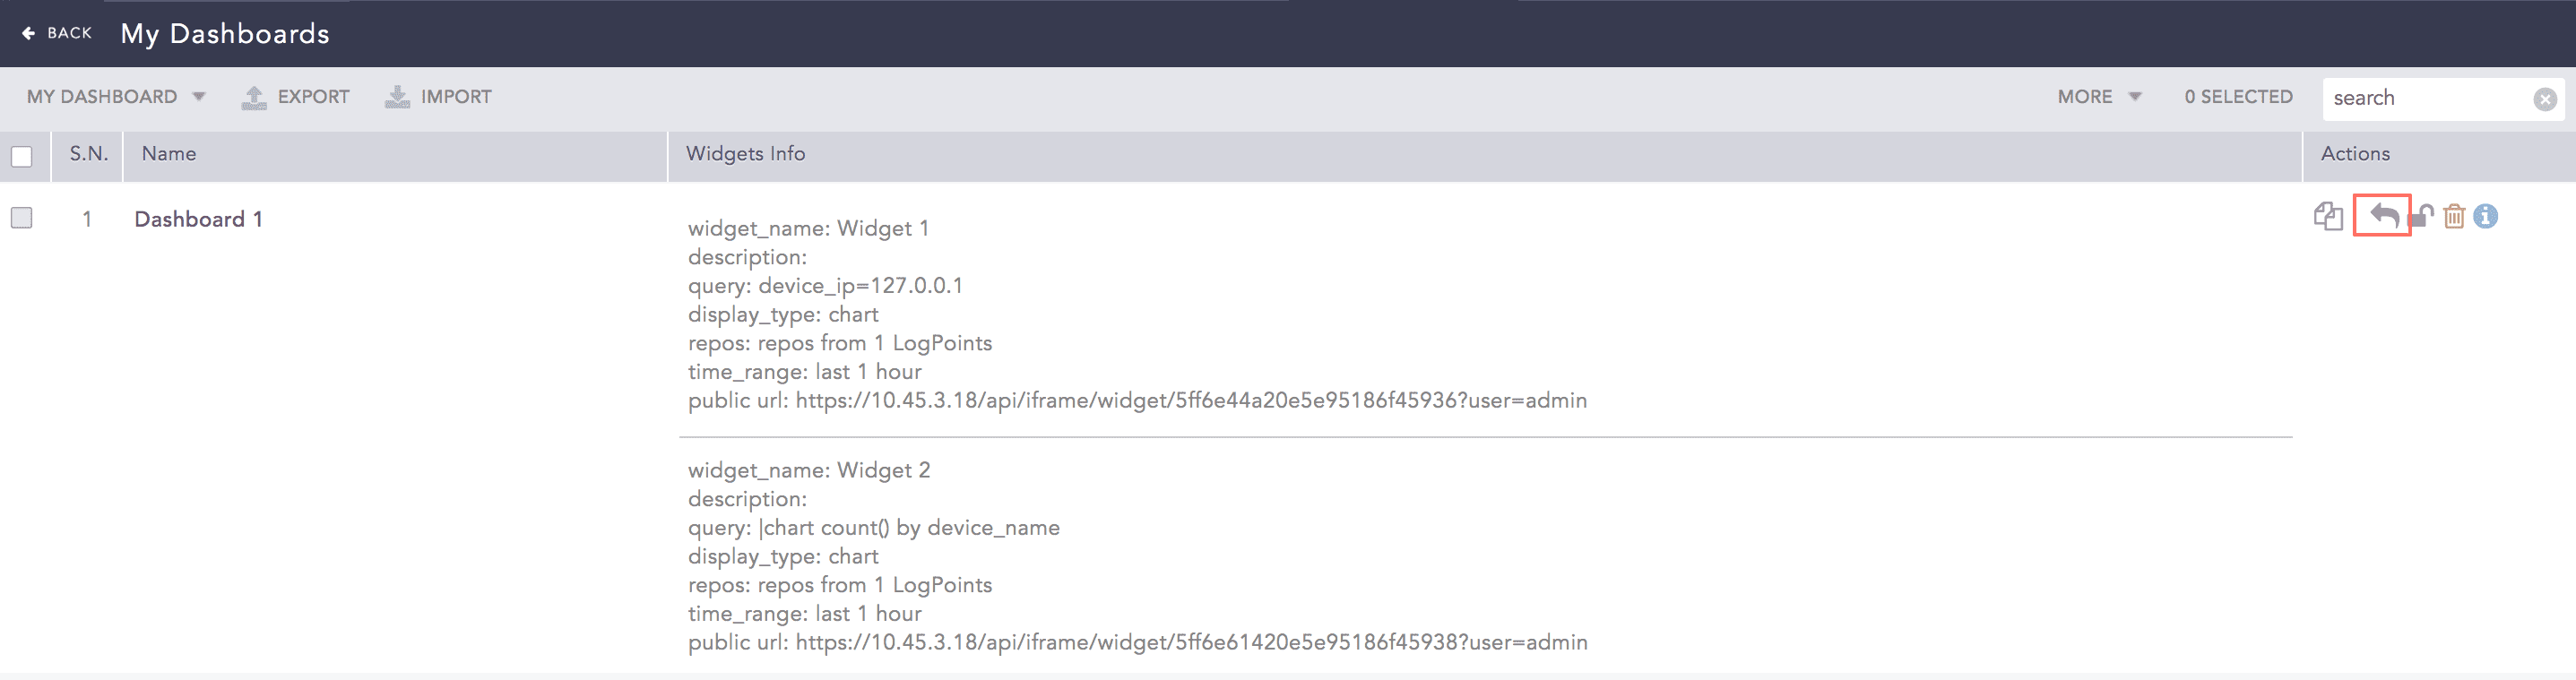
Go to Settings >> Knowledge Base from the navigation bar and click Dashboard.
Select My Dashboard from the drop-down.
Click the Share icon in the Actions column.
Select a User Group. All the users in that user group are listed in the drop-down.
Select the Read, Edit, or Full permission for the users.
Click Submit.
Go to Settings >> Knowledge Base from the navigation bar and click Dashboard.
Select Shared Dashboard from the drop-down.
Click the Use icon in the Actions column.
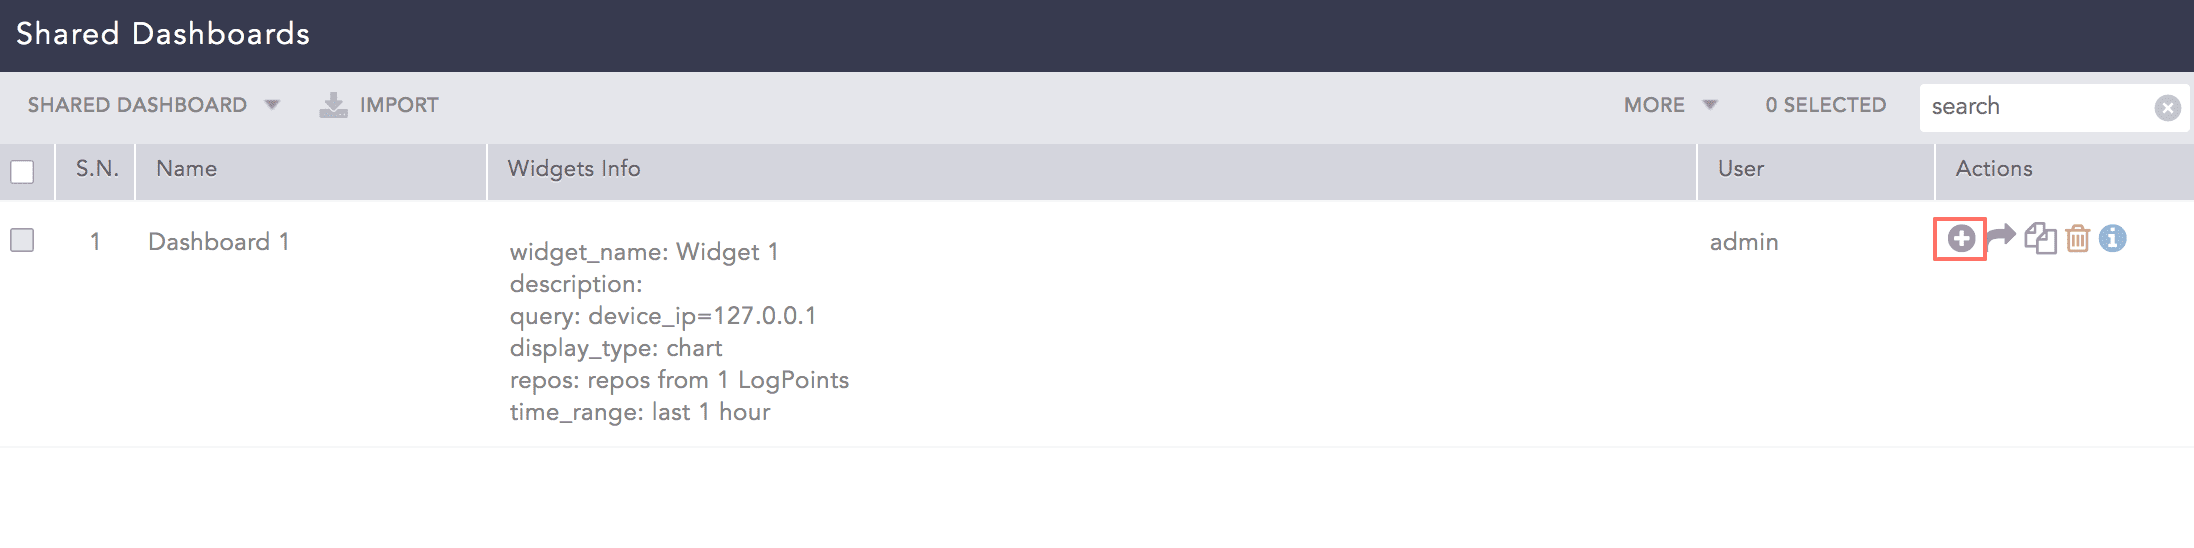
Using a Shared Dashboard
Note
If a user does not have access to a repo used in a shared dashboard, the dashboard is populated from other selected repos.
If only one repo is selected in the shared dashboard, and the user does not have access to the repo, the dashboard is not populated.
If the visualization for a widget in a shared dashboard is changed by users with the Edit or Full permissions, the change is reflected across all the users. However, if the visualization is changed by a user with the Read permission, it is only reflected for the current user.
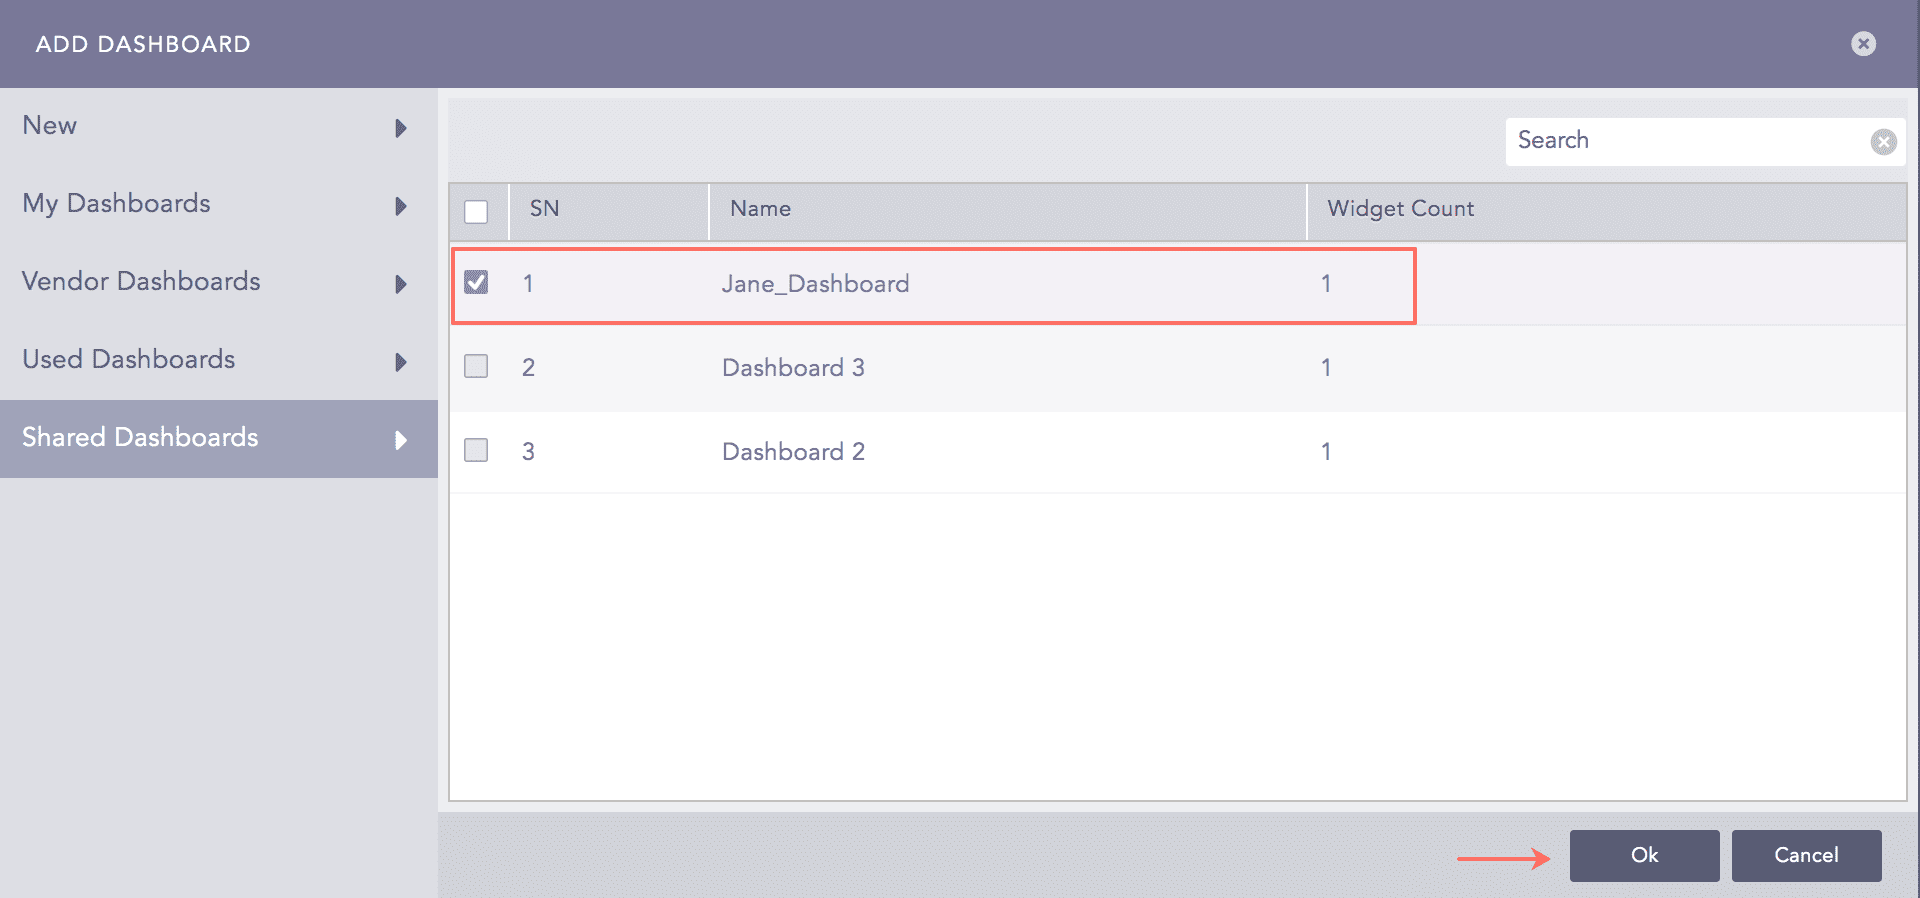
You can also use a shared dashboard from the Add Dashboard panel.
Go to Dashboard from the navigation bar and click the + icon.
Select Shared Dashboards.
Select the dashboard you want to use and click Ok.
Using a Shared Dashboard
Choose Repos and click Ok.
Go to Settings >> User Accounts from the navigation bar and click Users.
De-activate the user by clicking the De-Activate User icon in the Actions column.
Click Manage De-Activated Users.
Click the Delete icon in the Actions column of the user.
Click Yes.
Note
While deleting a shared dashboard’s owner, you must delete the shared dashboard or transfer the dashboard’s ownership to another user. You can do this from the Transfer Ownership panel that appears when you attempt to delete a user whose dashboard is being shared.
To transfer the ownership, select a user from the drop-down and click Submit.
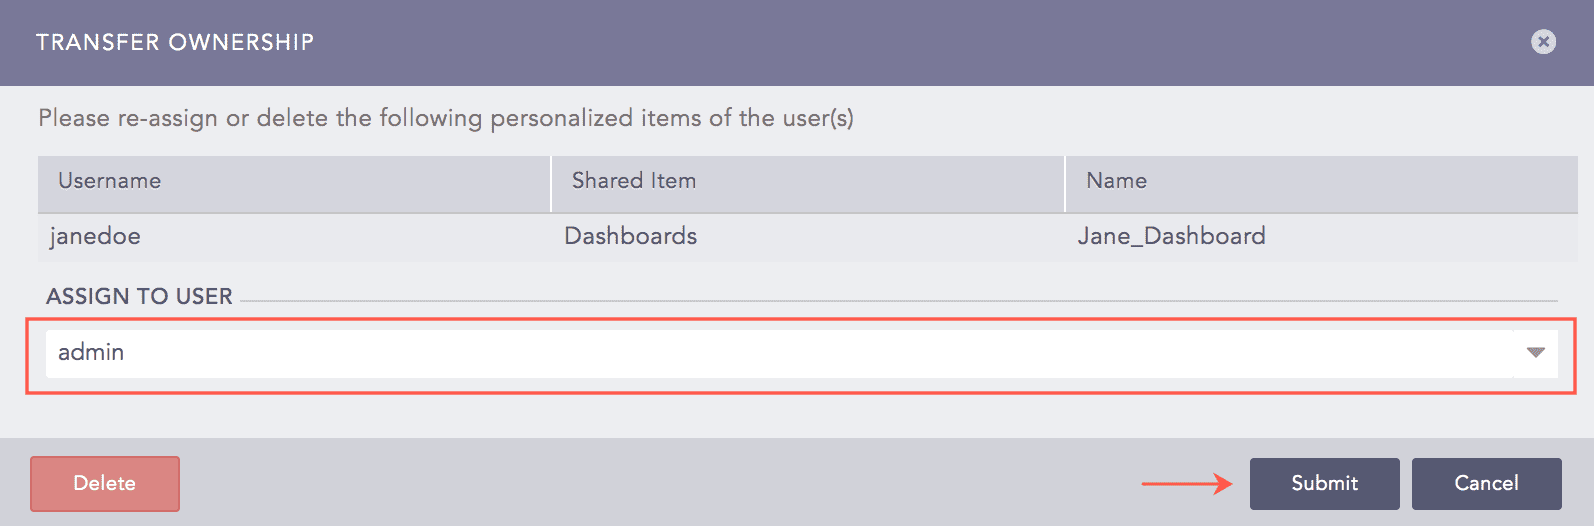
Transferring the Ownership of a Shared Dashboard
Note
The transferred dashboard is listed in the My Dashboards page in the owner’s system.
To delete the user and user’s dashboard without transferring their ownership, click Delete.
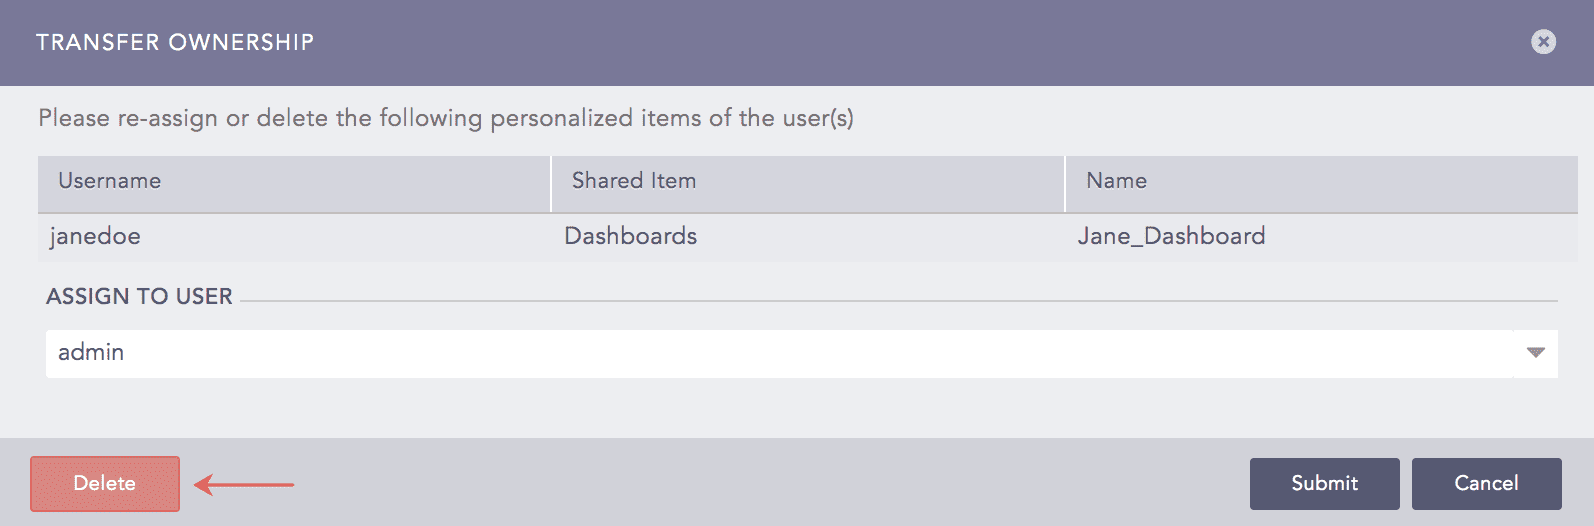
Deleting a Shared Dashboard’s Owner